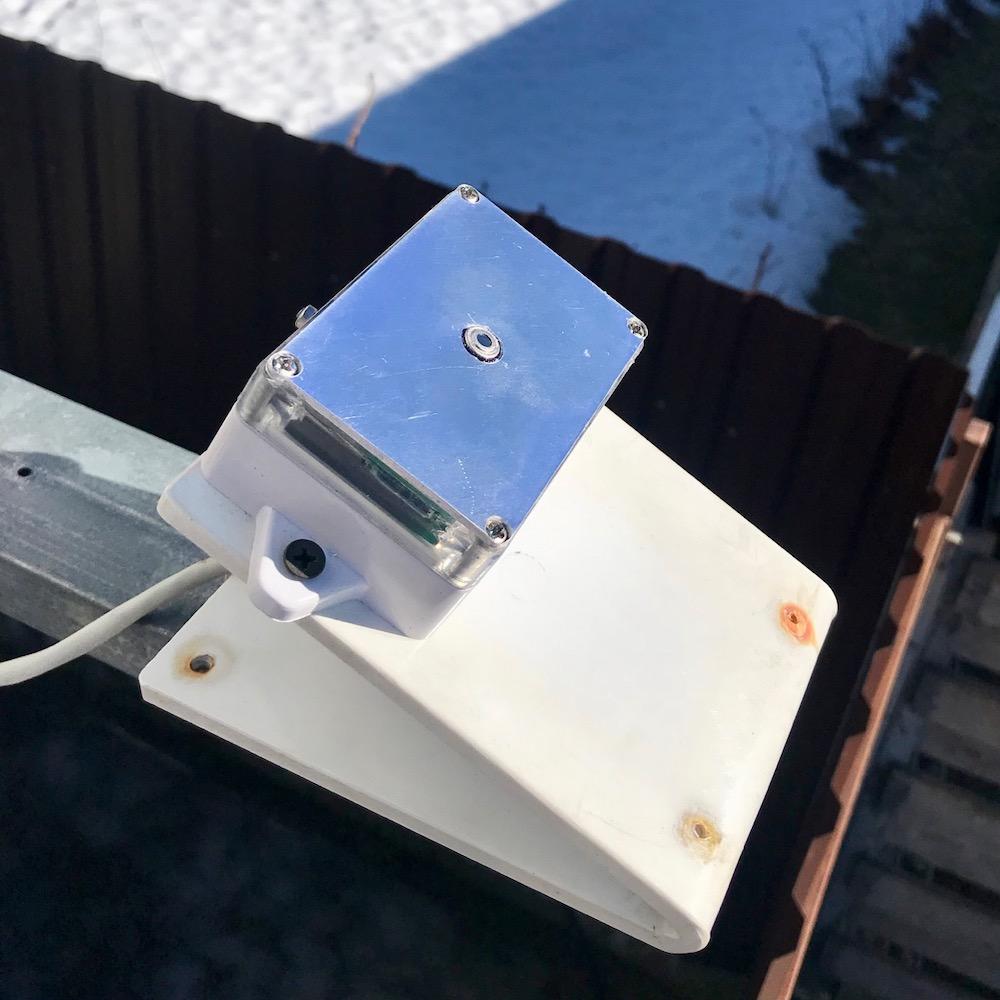
You need to install a weather station at an angle of about 15 degrees to the horizon and in the direction of the most likely wind in your area. Those. in the direction from where the clouds usually come. A photo of the installation of the weather station in one of our observatories you see below.
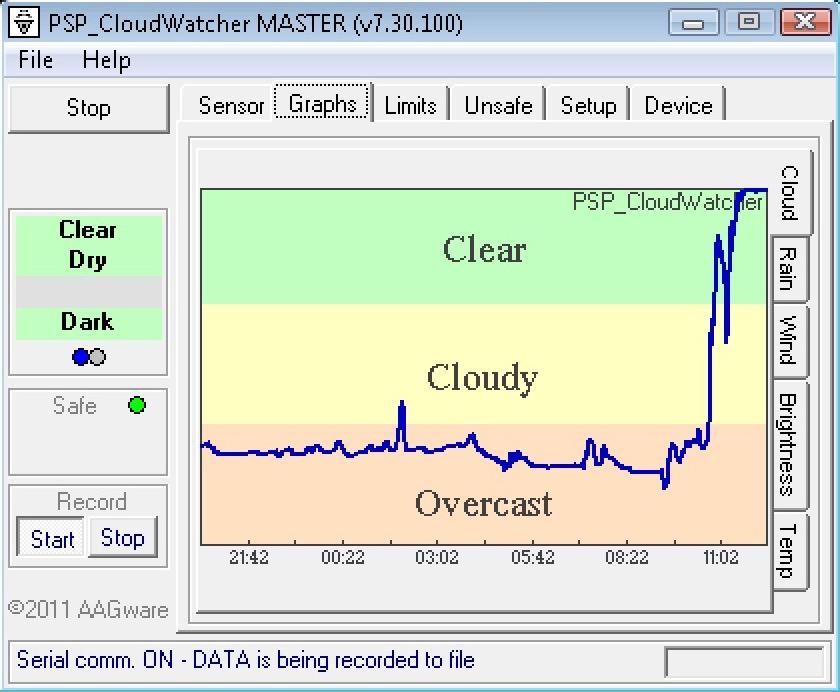
The weather station is fully compatible with AAG software. The software can be downloaded below on this page. More information about him can be found at of developer.
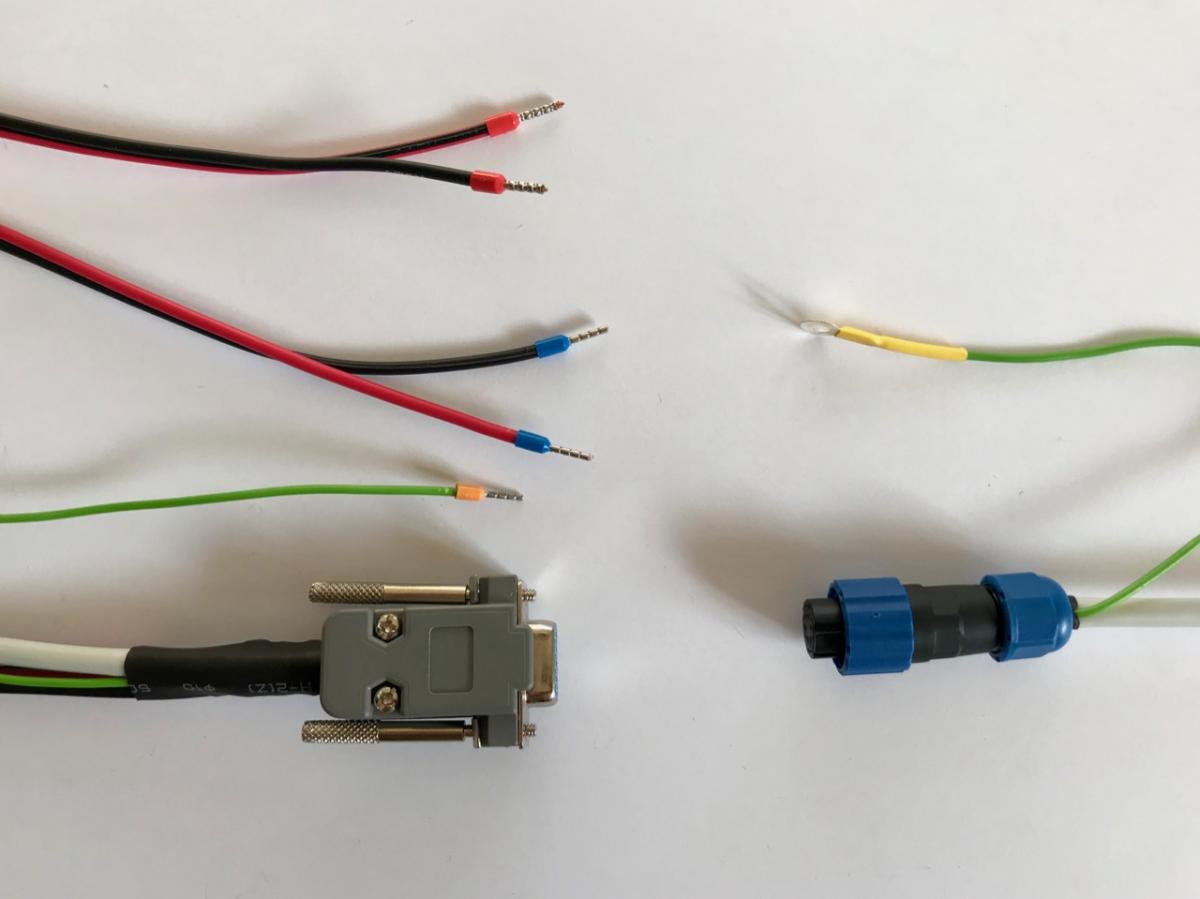
Weather station wires are connected as follows:
- A separate wire - grounding (not minus 12V, namely grounding).
- Two wires with red lugs - of which red + 12V, black - -12V. Voltage can be applied up to 14.5V - we tested this voltage value.
- Two wires with blue lugs are the contacts on the relay, they close (it is just a short circuit, and not a 12V supply to them) by the command of the AAG program when the weather is unsafe. Also, a closure occurs in the absence of communication with the computer for 5 minutes. The relay opens at the AAG command when the weather is safe.
- The COM connector is inserted into the COM port on the computer or through the COM-USB adapter.
Weather Station Tuning Program - Heater Control can be downloaded below on this page. No installation required, just unzip and run.
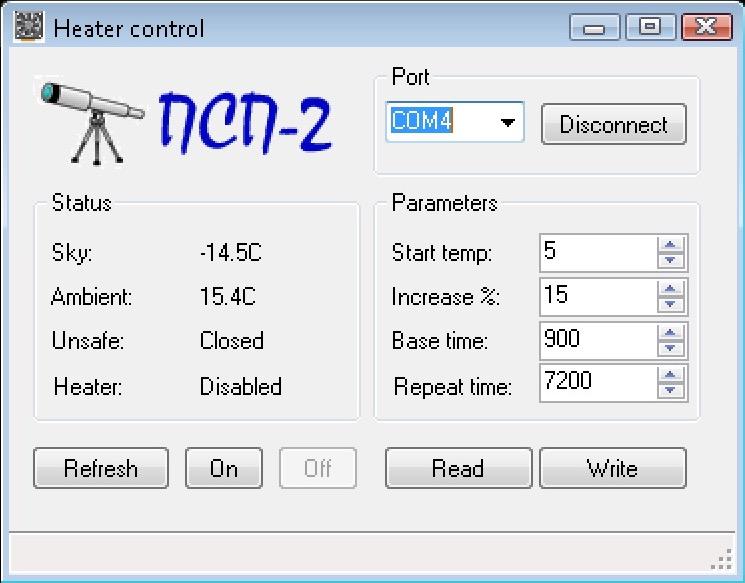
Select the COM port on which the weather station is connected to your computer and click the Connect button. After which you will see in the left part of the program the temperature values - sky and the environment. The latter temperature can be significantly too high in sunny weather, as the sensor heats up under sunlight. But we don’t have to pay attention to this, since we need the ambient temperature only during the work of the observatory, and this is night. At night, the temperature will be displayed correctly. Here you can also turn on / off the heating of the weather station in manual mode. On and Off buttons.
On the right side of the program you will find the weather station settings for heating. True, for this, you need to click on the Read button.
Description of setting values:
Start temp: - temperature below which the heating of the weather station will turn on. The default value is 5C.
Increase %:- increase in heating time as a percentage of the initial value, with a decrease in temperature for every 5C. Those. at 4C, heating will last 900 sec (next setting), and at -1C it will already be 1035 sec. etc. The default value is 15%.
Base time: - the basic operating time of the heating. The default value is 900 seconds (15 minutes).
Repeat time:- the time after which the heating will turn on. The default value is 7200 seconds. (2 hours).
The default values were tested over two winters and are considered by us as optimal. We do not recommend changing them. However, if you decide to change them, then do not forget to click the Write button to write the settings to the weather station.
It should also be emphasized that heating is turned on only in cloudy weather, in unsafe mode. In clear weather, in safe mode, it does not work.
The heating operation can be seen on the graph of the ambient temperature in the form of small peaks. See screenshot below.
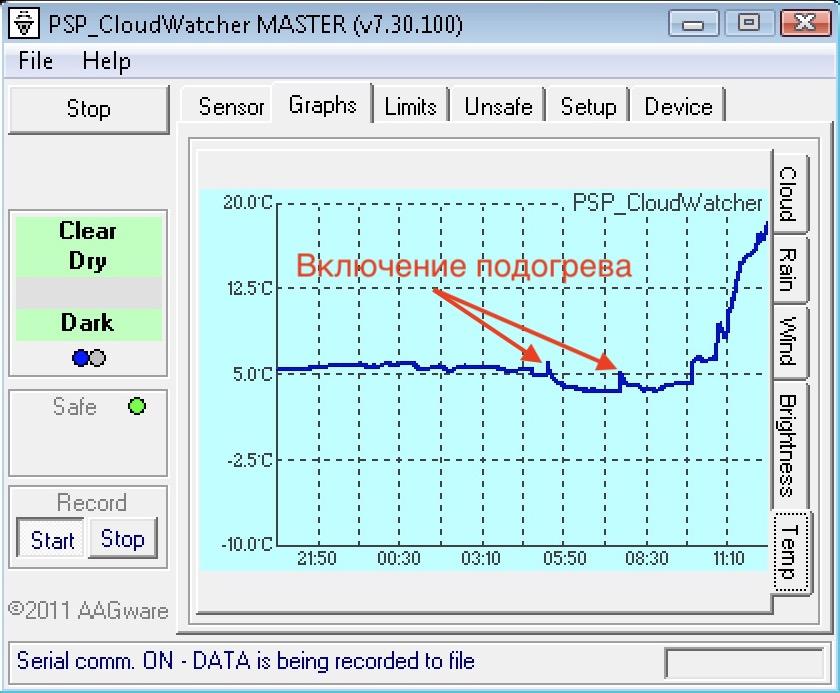
You only need to consider that it turns on only in unsafe mode (cloudy) and at a temperature lower than the weather station specified in the settings.